Friday, December 31, 2010

Happy New Year!

In this blog I’d like to draw attention to another blog: http://365dayswithjoel.blogspot.com.

I started reading this woman’s regular blog after seeing her post on one of the message boards I frequent. I don’t remember what made me check out her blog but I did and found it rather entertaining. I think it had something to do with cooking, it was amusing and from her blog I learned of Bakerella, one of my now favorite sites!

In reading her blog I saw references to a tragedy that had occurred in her family and so started digging into back blogs to discover what had happened. She had carried her son to term, 40 weeks, only to discover he had no heartbeat in the womb. Her son Joel was born sleeping. Heartbreaking as her story was, I was amazed at the humor, spirit, and strength with which she wrote about her experience.

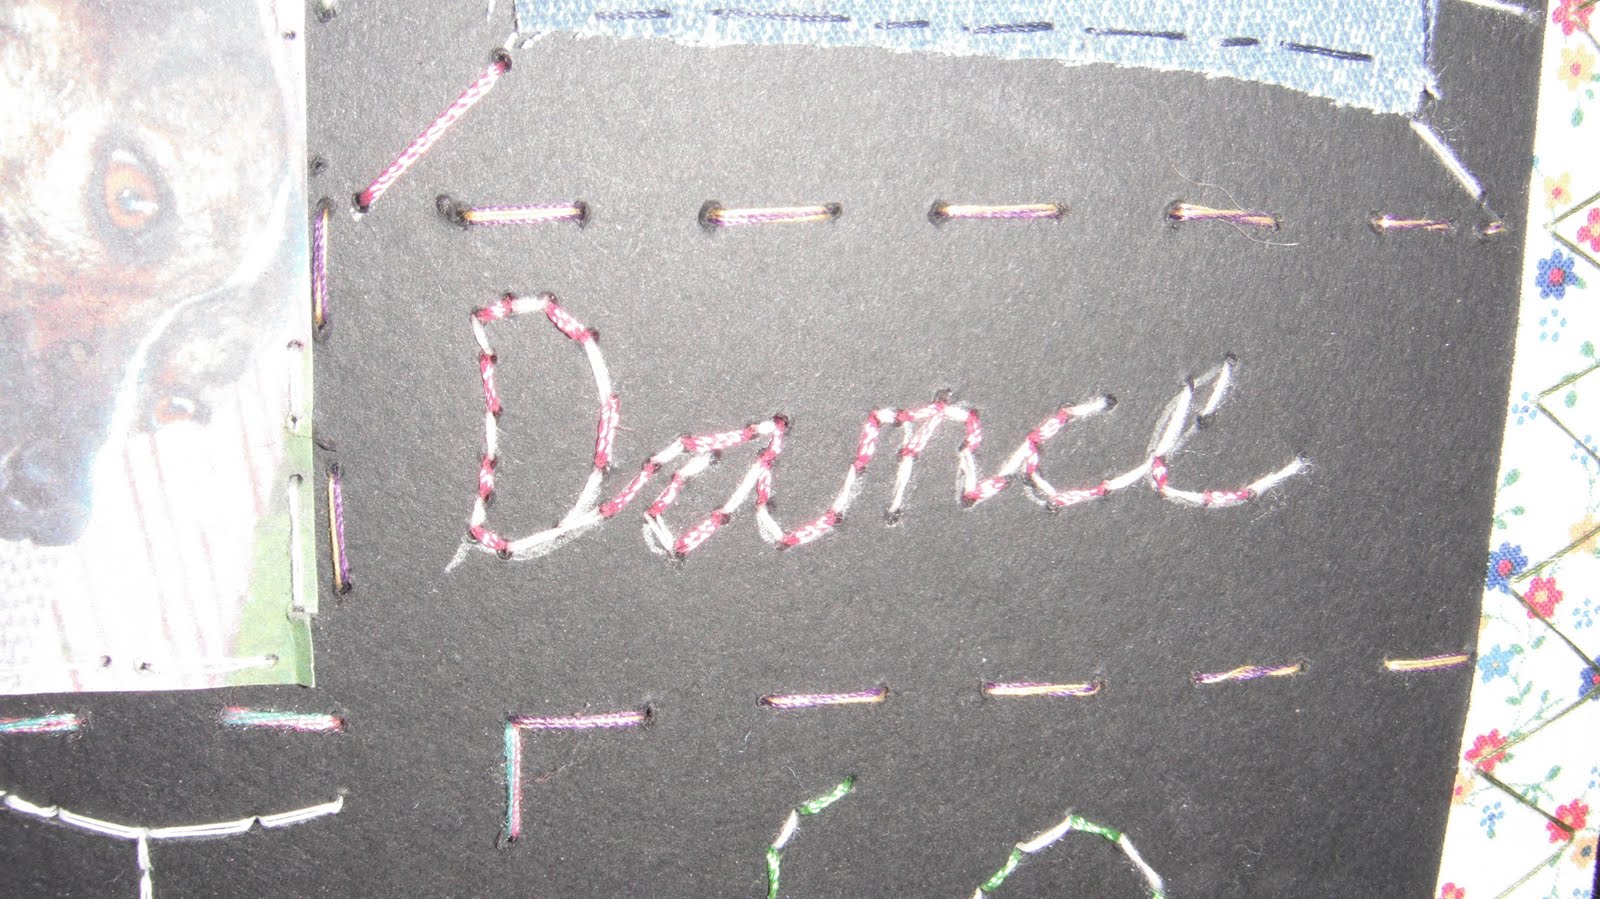
So, when she posted about this project on the boards I was eager to take part in it! Basically the idea is to collect 365 pictures of the name Joel. She wants to make a photobook at the end of the year as a keepsake for her son.

People are often afraid to mention the name of a lost child at the risk of upsetting the family. However, in my experience, parents and family members of a lost child are often eager to get the chance to talk about their little ones. Our society is uncomfortable with death and would like to sweep it under the rug and hide from it whenever possible. These families are often left feeling rushed to just “get past it” or “move on” and in some horrible cases they are even told to “stop bringing everyone else down”.

I would like to celebrate Joel and his family and all the little ones gone too soon. I think this project is a fabulous way for this family to remember their child and a good way to encourage others who have been told they shouldn’t publicize their tragedy.

Now, onto a more personal note: I never have New Year’s Eve plans, for whatever reason, I never get invited to parties and can never find anything to do. So I tend to be a little annoyed by the holiday. This year I was being a jerk about it to someone I rather care about and I’m sorry for that. It had bothered me all week and I’m ashamed to say I threw a bit of a fit. Not my proudest moment.

For some reason however, I woke up the next day feeling truly over it. I wasn’t annoyed anymore, any jealousy due my lack of plans was gone. For whatever reason, I woke up at peace with it and with an idea. Since I planned to make something for this 365 days with Joel project, I decided I would devote New Year’s Eve to working on the project.

So ladies and gentlemen, that brings me to the actual project for this post. I had a few different ideas floating around for what I’d do but when I sat down to work on it, I discovered that I had…crafters block.
My dad’s apartment building has a communal library for the residents with a table in the back room where people can set out things they no longer need and others can come along and take it if they can use it.
I found a stack of Christmas and holiday cards and decided to grab them and see what I could do with them. The pictures make it pretty obvious what I chose to do with them. I like birds, for me they are a symbol of freedom and renewal. So I cut out all the little red birds I could find and then made Joel’s name with some cute gingham fabric I found in my stash!

I’m not a religious person, but I am, in general, a somewhat spiritual person. Be it karma or angels or what have you, I like the idea of a guarding force. I like the idea of a lost little one resting peacefully on a fluffy cloud. Say what you will about what that means, I just think it sounds nice. I also think snow angels (or if you’re from California like me, sand angels) are such a fun and natural part of childhood so when I came across the snow angel card I really fell in love with the image.

Inside the other cards I found the letters I needed to make Joel and the word peace. I like to think Joel is at peace knowing his momma is remembering him in such a wonderful way.

So, I had planned to make a more permanent project but then I couldn’t figure out what I’d do with the pieces once I was done. So this sort of collage inspired photo project was born. I may make more things for Joel should the mood strike me and if I do, I’ll be sure to share them!

In the meantime, I’m pleased with what I’ve come up with and I feel good about using this project to help me bring in the new year.


I hope 2010 treated you well and I hope 2011 treats you even better. 

Happy New Year, Readers!!!

Wednesday, December 22, 2010

Santa’s Littler Helper!


I love Christmas time! I also love wearing Santa hats. I’m always on the look out for cool looking Santa hats as soon as the season rolls around. I have a big, soft, fluffy one, and one with a black brim and pom pom on top, I even have a cute felt elf hat with a bell on top.

But this year I decided what my collection really needed was my very own knit Santa hat!

I don’t currently knit in the round. Since I am a mostly self taught knitter, I’m still aquiring skills, I can do quite a lot with straight needles but double points and circulars are not something I’m familiar with. Unfortunately, literally every Santa or elf hat pattern is for double point or circular needles. I’ve mastered the beanie on straight needles but I wasn’t exactly sure how to get the cone shape.

I looked up some patterns and tried to figure out if I could adapt them for straight needles. I found one pattern that looked like it had a straight needle option and kinda skimmed it. And by skimmed it, I mean didn’t pay a lot of attention to what it was saying.

So I got started on a hat and tried doing what I thought this pattern was telling me to do, which was to knit for about 5 or 6 inches and then start decreasing one on each end every other row…this did not end up going well…you might even say it was an epic fail. I imagine if a better, more experienced knitter were reading this, they would probably laugh at me.

I am constantly working to improve my knitting skills but I’m not so seasoned that I can always tell how something is going before I finish it. Sometimes things look completely wrong to me right up until I either cast off or sew it up. Anywho, when all was said and done I was left with a hat that looked more like a…well it looked kinda like a mountain with a pointy cliff. This, dear reader, was not the desired result.


So I took a couple pictures of the monstrosity so I could send them to a friend to laugh at and then decided I would try it the way I had originally thought about doing it.

Turns out my way was the right way. I basically made my normal beanie shape but put more rows between the decrease rows and started with fewer decreases which essentially made a nice cone shaped hat!

When the hat came out looking more like a Santa hat should, I made a pom pom for the top, sewed it all together and was quite pleased with the end result.

I’m rather proud of this hat and I have to say, I get comments every year when I wear my Santa hats around town but I’ve gotten more compliments on this particular knit Santa hat than any other Santa hat I’ve ever worn! It’s kind of a nifty conversation starter, people tell me they like it and then asked if it’s home made. So of course I say it is and that I made it and before you know it I’m discussing crafts with complete strangers!


Thursday, December 16, 2010

Franken Hat and Franken Baby!


So, I’m trying to get myself back into blogging more regularly. To that end, I thought I’d follow up my last post with a couple  of my Franken Projects.

As soon as Franken Ball was born, I was excited to make something with it. Since I had no idea how it would knit up, I decided to try it out on a hat. Hats are nice and easy and a good way to see what the yarn looks like in a project.

So I knitted myself this cute little hat with ears! I normally knit my hats with two strands of yarn knitted together. So, for this hat, I used Franken Ball and basic black for the body. For the ears I used Franken yarn knitted with soft, fuzzy yarn.

I loved how random it came out! Also, when I tie the pieces of yarn together to make Franken Ball, I don’t trim the ends, I leave them sticking out and I like the kinda shabby look it adds to projects made with Franken Ball!


The next project I used Franken Ball for was a gift for my cousin’s baby! The momma to be requested something a little edgier than the classic teddy bear. She suggested something with extra legs and eyes. Obviously I didn’t go that route exactly but it was a good jump off point.

So this is the little monster I made for her little monster! Baby Jax is still a little young to appreciate my handiwork but I hope eventually he does come to enjoy the little guy.

Most of Franken Baby’s body is more or less the same as the hat, Franken Ball knitted with black. I got tired of the black and decided to knit the legs with Franken Ball and dark green. The two strands knitted together helps make the weave a little tighter which is good for keeping the stuffing inside. 

I embroidered (sorta) a different face on each side of Franken Baby and actually had the head spikes/hair already lying around.  I had made it for something else and then changed my mind and used something else it made the perfect spikey topper for the little monster.


Franken Hat and Franken Baby are both quite soft and fun to touch because there are so many different textures!


Thursday, December 9, 2010

Franken Ball


It’s high time I introduced you all to Franken Ball!

As any crafter knows, when the project is done there are always scraps and bits and pieces of crafting materials left over. They are too small to be used again for their original intention but it often feels wrong throwing them away. It could be some extra scraps of material from cutting out a pattern, left over beads from making jewelry, or in my case, left over bits of yarn.

At the end of every knitting project, even if it’s knit completely in one color you will usually have at least a couple tails left over from your working yarn. These pieces are usually only a few inches long and can’t really be used for another knitting project. I think most people probably toss these. I on the other hand, compulsively save them.


Once I have a good amount, like a plastic baggy full, I sit down and go through them. The ones that are something like 2inches are under go back into a different collection and are used as filling for small things like cherries on top of hats and what not.

Anything longer than that gets tied end to end in random order and wound into a ball: Franken Ball.

Franken ball is always different, always’s growing, always random and really fun to work with! I like to find different textures to add to Franken Ball because they really change things up. Once in a while I find a damaged sweater or scarf and pull it apart and add pieces to Franken Ball but for the most part, Franken Ball is made up of pieces of my working yarn or ends of a skein or ball that aren’t useful for anything else.

Most people would probably find tying billions of pieces of yarn together to be pretty tedious but I’ve always had a thing for tedious projects. They keep my hands busy without taking up too much of my brain, I find them soothing.

Franken yarn also looks really cool because it is intentionally random, you never know how exactly a project will look! Because I use so many different types of yarn on Franken Ball, I usually knit it with a second yarn to make up for any lack of bulk.


Tuesday, December 7, 2010

Christmas Ornament Tutorial!


Ok, this is my first tutorial, so be gentle with me, dear readers!

My most recent project has been these fun and easy handmade Christmas ornaments! As I’ve said before, I’m normally a knitter, but I have carpal tunnel and sometimes I have to take a break from the knitting. My hands like to be busy though so I decided I needed a simple sewing project. I also needed some easy but cute gifts to give as last minute gifts and to people I don’t know well but am still expected to give a gift to. Extended family, family friends, etc…

I would say this project is definitely beginner friendly! I am not very good when it comes to sewing. I tend to lack the patience for the exact measurements needed for many sewing projects so I like to keep it simple. So I’m short on technical terms here but it’s all pretty easy! So lets get started, shall we?

Lets start with what you’ll need:
  • Whatever fabric catches your eye
  • A sewing needle
  • Some thread that works with your fabric
  • Some buttons (I scavenged mine from some clothing that couldn’t be saved. I like them kinda random)
  • Scissors
  • A marker (I used a sharpie, not pictured)
  • Ribbon, string, or twine
  • Some fiber fill or whatever you like to stuff things with


And off we go


Remember how I said I’m not so good with the exact measurements? I turned my fabric over on the back side and folded it in half. Then I drew the pattern on the back side of one half of my folded fabric.


Remember how I said I’m not so good with the exact measurements? I turned my fabric over on the back side and folded it in half. Then I drew the pattern on the back side of one half of my folded fabric.
Then, holding the fabric together (you could pin it first to keep everything in place but I just hold them together) I cut out the shape I’d drawn on my fabric. I used a fine point sharpie. You can use whatever you are comfortable drawing on your fabric with. I knew my pen marks would be hidden by the time I was done so I wasn’t worried about it, I’m a little devil may care with my sewing.

You could also draw your pattern a little bigger than you intend it to be and cut just inside your lines thus eliminating them completely.

For reference, my trees are right around 3 inches tall from trunk to tip and 2 ½ inches wide at the widest part 


So, now I have two Christmas tree shapes and some scraps. For this one I tried using my scraps to stuff my tree, it wasn’t quite enough and in the future I will stick with fiber fill but if you have enough scraps, it’s a nice way to use every part of your fabric. Plus, if you’re lazy like me, it’s less clean up!


Now we begin sewing. I used a blanket stitch but you could use just about any stitch you’re comfortable with. I imagine you could make a ton of these if you used a sewing machine but sewing machines and I never got along and they don’t give me the busy, happy hands feeling I get from hand sewing things. What’s nice about these is that I wanted them to look handmade and a little rustic so if your stitches are a little uneven it just adds to that affect!
I should also mention that you could straight pin your pieces together before you start sewing but for something this small, I didn’t bother. Lol I usually end up stabbing myself with the straight pins so I use them as little as possible.


Since I used a wider piece of ribbon, I had to switch to your average run of the mill stitch for the apex of the tree. This is where the button comes in handy later. The button, or your tree topper, if you will, helps distract from the fact that stitch changes.


To add the ribbon I slid it between the two pieces of fabric. I placed it down just far enough so that the corners of the ribbon were hidden within the body of the tree. You can just hold it in place but I found it much easier to just put a pin in it. Everything stays in place and your fingers don’t have to worry about holding onto the ribbon as well. 


So continue stitching everything closed. On the second side of the tree I stitched a little more and then with about an inch opening left, I stuffed my tree. You’ll want to make sure you stuff the trunk of the tree and make sure some filling gets into the tip of the tree so it’s not floppy. I used the end of a knitting needle to get the filling into the small spaces but you could use just about anything, the end of a pen, or your fingers if they aren’t all pudgy like mine.

Once stuffed, finish sewing up the side and you’re almost done! Sew a button tree topper on each side of your tree so it looks good from all angles and you’re done!


Merry Christmas

Author: Sweet Von Pea (AKA Meagan Ingerman)


Wednesday, September 29, 2010

What A Hoot!

So, since I cannot knit these days I’ve been doing some sewing projects. I’m not a very good seamstress but I am good at faking it till it looks like something recognizable.

I realize owls are really trendy right now and I’m generally not a trendy person but I also refuse to deny my enjoyment of something just because it is trendy at the moment. To that end, I’ve been working on some stuffed owls!

These guys are a little weird but I think they came out pretty cute! What’s more, they are mostly upcycled materials, the rest are fat quarters. I love collecting fat quarters with awesome prints!

This little guy's body is made from a discarded button down shirt, the green for the feet and eyes is made with scavenged felt, and the lighter part of the eyes is khaki from an old pair of pants. The triangle on top is made from my fat quarter collection. for my attempt, I'm really proud of how he came out!


Lol, this next little guy looks kinda like Frankenstein...Frankenowl! His body is made from an old set of capris, i used the same scavenged felt for the eyes, beak, and to give the feet more structure. The feet, eyes, and triangle are, again from my fat quarter collection!


So the design still needs some perfecting but I'm pretty happy with my creations!

Thursday, September 9, 2010

Me: A Collage

I know, I know, it’s been a while since I last posted. Life has been a bit busy and there has been some bad news but today I finally go around to photographing a project I wanted to share.

Up until the other day I was doing  a ton of knitting so I have a good amount of knitting pictures and some new projects that I need to take pictures with but today I want to share another non knitting related project. I had fun showing off my door display in the last post so I thought I’d finally take this baby down off the shelf and get some good pics of it while the lighting is good.

I guess it was the spring before last that I took an art history class. I was just working on some general ed credits. It fit my schedule and more importantly, it was at the extension campus in my town so I could walk there instead of taking the two busses it takes to get to the main campus!

Anywho, along with a journaly type thing that I kinda half assed, the major semester project was a collage piece that represented our lives or an important aspect of our lives. You know how it goes with artists, you aim for one thing and sorta see how it comes out in the wash.

When I was very young, my dad taught me to sew by drawing a picture on a piece of fabric and telling me to follow the line with the needle. I can now do some more practical sewing, mending seams, replacing buttons, sewing together pieces for a project, etc… But one of the things I still get great joy from is this amateur sort of embroidering.

So, I bought a piece of foam board, mapped out some randomly sized squares and rectangles in pencil and got to work. At first I tried just following the line but it turns out foam board is a somewhat different animal than fabric.

In sewing on the trim I realized that I needed to pre-poke the holes in order to get the needle through…then I realized I needed to put some thought into where I poked the holes if I wanted a design and not a mess. I gave myself about 2 weeks to finish this bad boy and know now that it’s more like a month long project…especially since I was working , babysitting, and going to school at the time.

Anywho, I would sit for hours just poking holes with a straight pin along the lines I’d mapped out. That took forever, but it was the easy part. I then had to decide what the heck I was going to put on this thing!

In the daycare I worked in, I’d been going through magazines collecting images for the kids to use for their own collages. Collages were my professor’s main focus this semester so it kinda blend into other aspects of my life. So I went through the images I’d cut out for the kids and selected some of those, printed some pictures off the internet, printed out some of my own photographs and filled in with some embroidery on the board itself and some small embroidery projects I’d done in the past and a couple I did specifically for this project.

This post will be more picture heavy than usual but I’m very proud of this thing. Lol, I’m an artist in my own way but I don’t draw, stick figures tend to give me trouble. So I felt good when the other art students in my class ooed and ahhed over my project. It seems kind of silly but those little bits of validation can make a big difference for one’s ego.


The back is one of my favorite parts. the front is neatly arranged the way we try to present ourselves to the world and the back...like the inside of my head, is chaos.